Multipart uploads to Cloudlfare R2 + Workers
This tutorial will show you how to implement a multipart upload to a cloudflare R2 bucket using cloudflare workers and the aws-sdk. You will find this useful if you need to upload files larger than 5GB to cloudflare R2.
Github repo with the code for this tutorial can be found here
- Configure R2 bucket
- Setup a basic R2 worker
- Server side logic for multipart upload
- Client side logic for multipart upload
- Testing it out
Configure your R2 bucket#
Before writing any application logic we first need to setup a bucket in cloudflare R2.
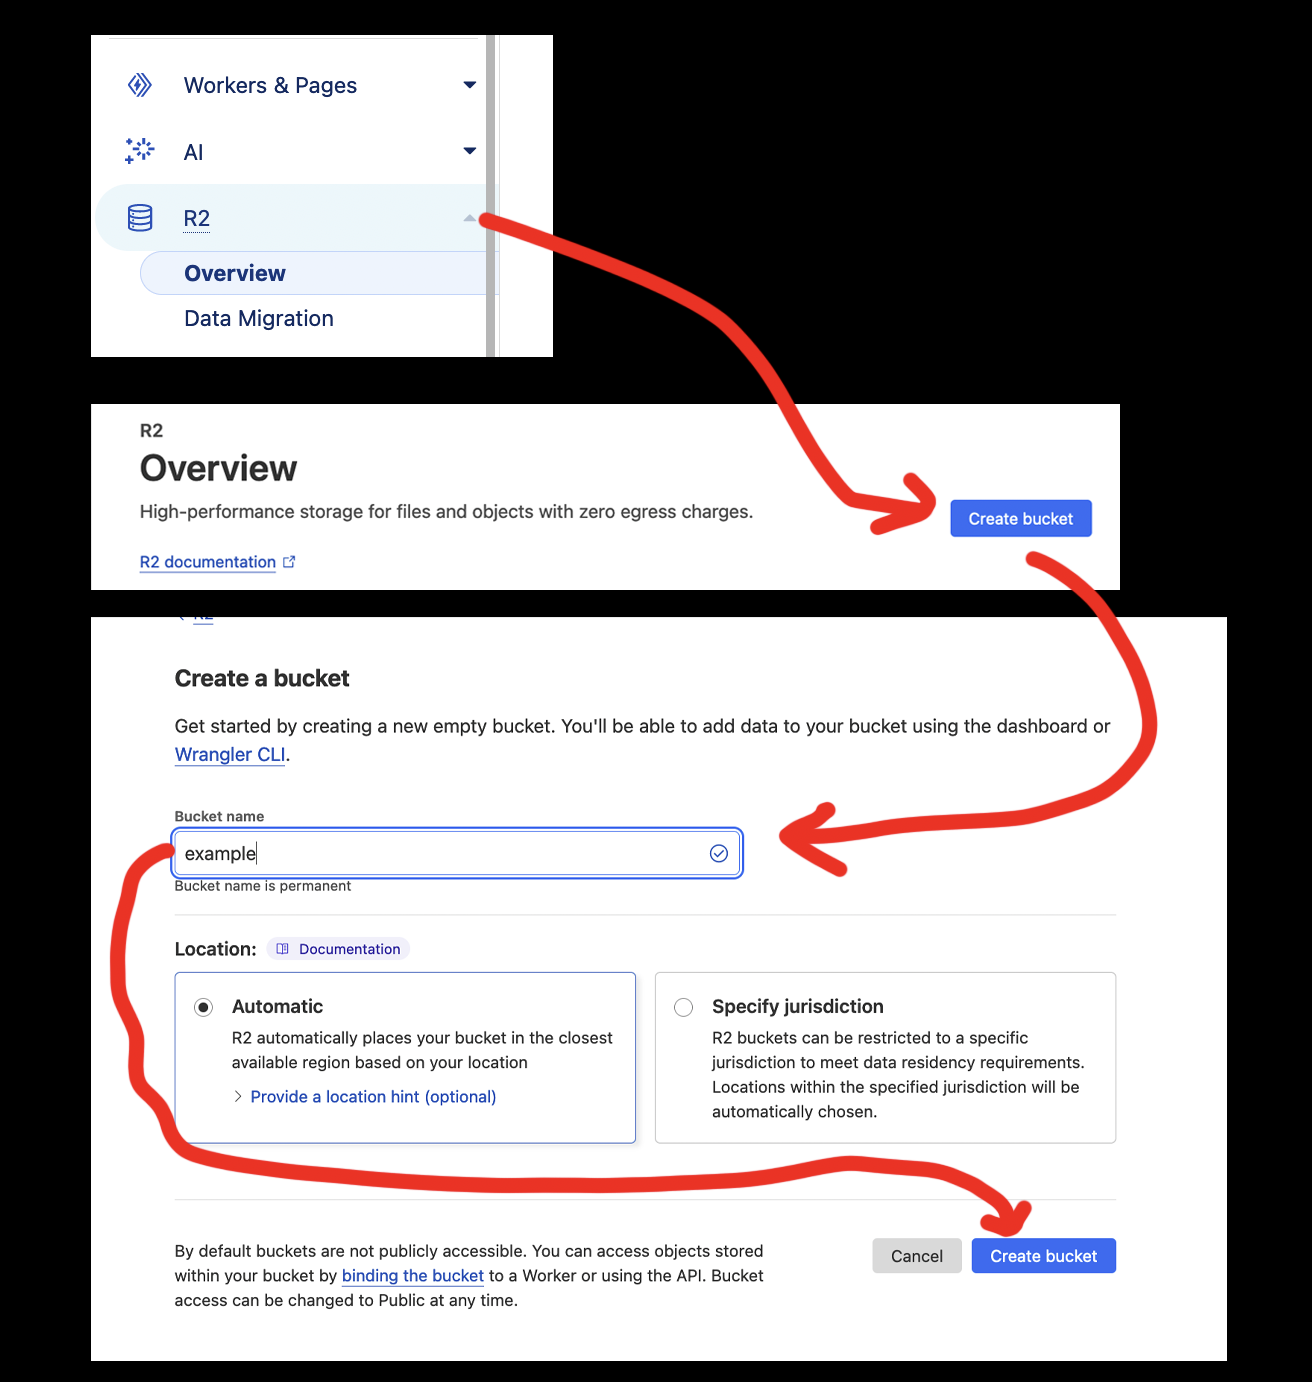
Create a bucket#
- Navigate to the cloudflare dashboard and click on
R2in the left hand side bar. - On the overview page click on
Create Bucket. - Give the bucket a name like
exampleand clickCreate Bucket.
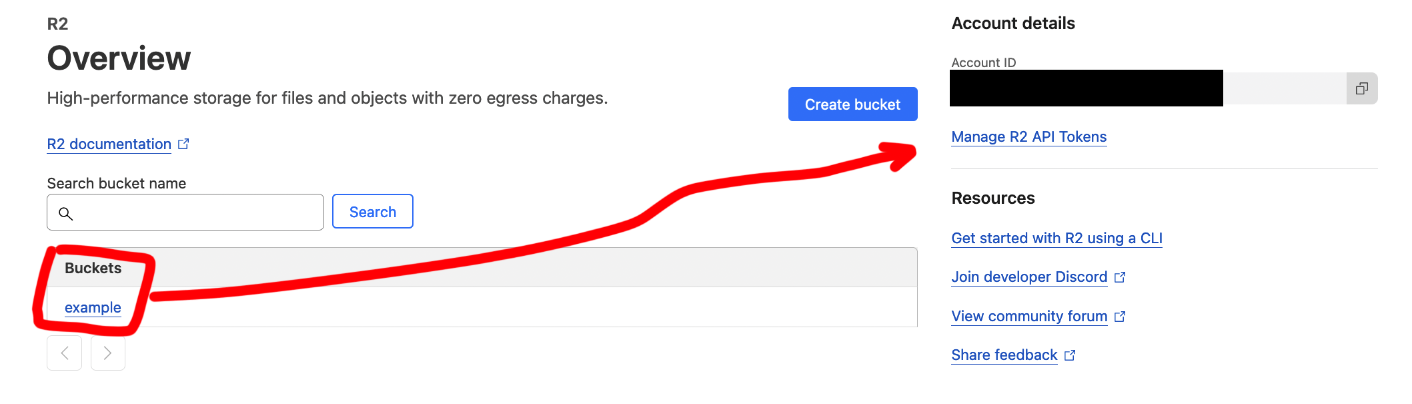
Create API credentials#
Next we need to create an api token to access the bucket. If you go
back to the overview tab you should your new bucket created
and on the right a Manage R2 API Tokens button.
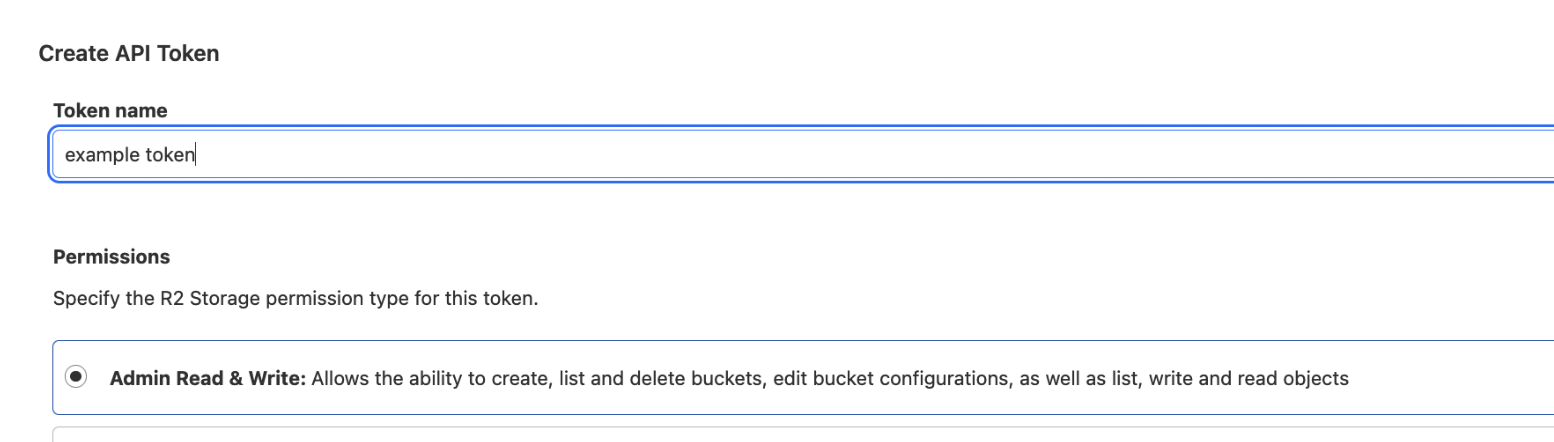
Click Manage R2 API Tokens > Create API Token. Then in the form give your token a
name like example token and set the permissions to Admin Read & Write. This
is only for demonstration purposes and you should do your own research on what
permissions you need. Scroll down and click Create API Token.
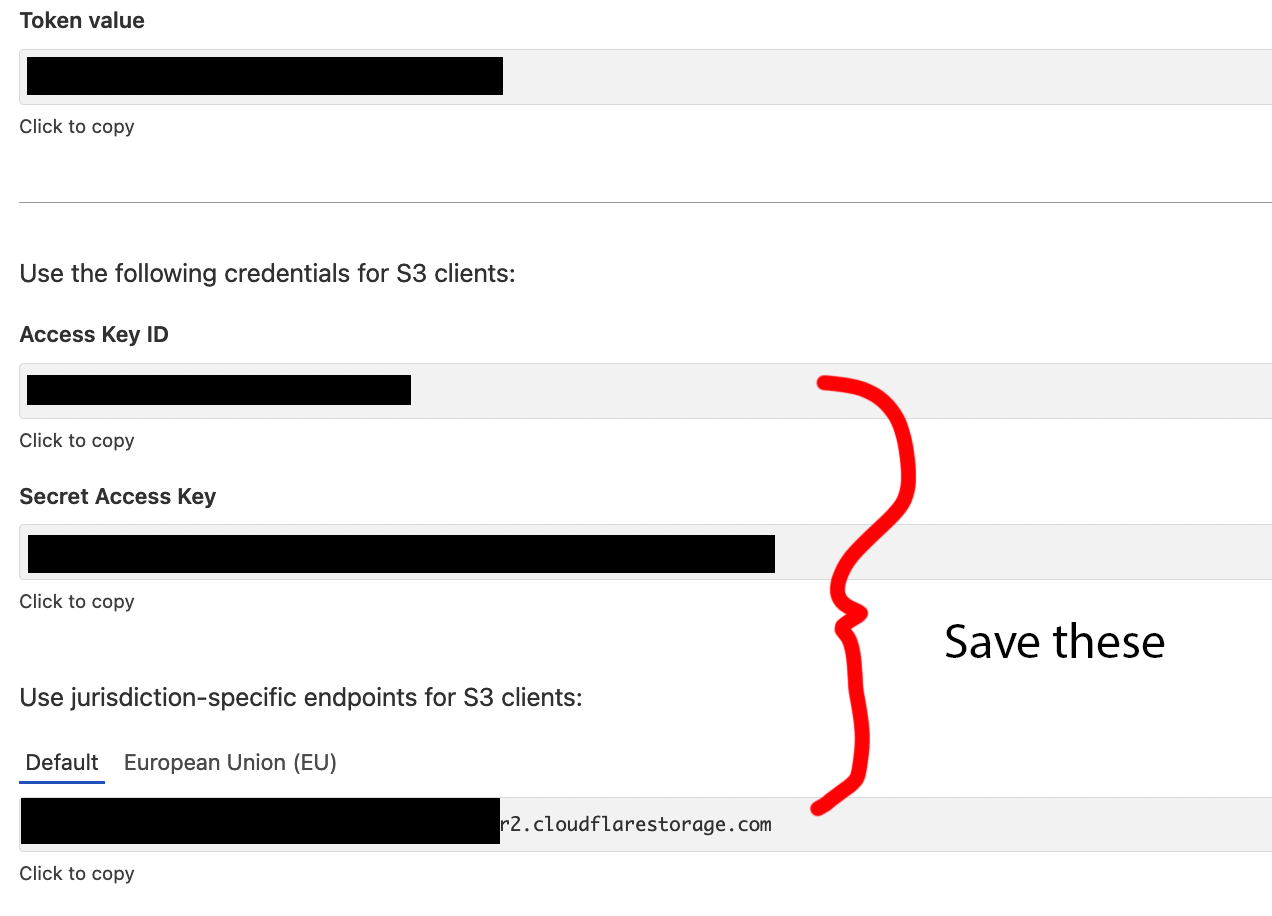
This will take you to a page with your API token values. For this
to work you only need Access Key ID, Secret Access Key and the url
under Use jurisdiction-specific endpoints for S3 clients: allthough
it is wise to save the Token value if you plan on using it later.
Create R2 CORS policy#
Next we need to add a CORS policy to the bucket. This will allow you to serve the files from the bucket later on.
- Navigate to your bucket in the R2 dashboard.
- Select the
Settingstab. - Scroll down to the
CORS Policysection and clickAdd CORS Policy. - Paste the following json into the text box and save
[
  {
    "AllowedOrigins": [
      "*"
    ],
    "AllowedMethods": [
      "GET",
      "PUT",
      "POST",
      "DELETE"
    ],
    "AllowedHeaders": [
      "*"
    ]
  }
]
Setup a basic R2 worker#
Make a folder called example-r2-multipart-upload and install
wrangler and aws-sdk with the following commands
mkdir example-r2-multipart-upload
cd example-r2-multipart-upload
npm init -y
npm install wrangler --save-dev
npm install aws-sdk
Authenticate wrangler with cloudflare with the following command. This should open a browser window.
npx wrangler login
After that veify that you are logged in with the following command. It should print your account email and id to the console.
npx wrangler whoami
Next create folder called src with a index.js file inside it.
mkdir src
touch src/index.js
Add the following code to src/index.js
export default {
	async fetch(request, env, ctx) {
		return new Response('Hello World!');
	},
};
Next create a wrangler.toml file with the following contents
# must me the same as the folder name of the project
name = "example-r2-multipart-upload"
main = "src/index.js"
# use current date
compatibility_date = "2024-05-07"
compatibility_flags = ["nodejs_compat"]


[vars]
R2_ACCESS_KEY_ID = "<your access key id>"
R2_SECRET_ACCESS_KEY = "<your secret access key>"
# under "jurisdiction-specific endpoints for S3 clients" when creating the api key
CF_ENDPOINT = "<your endpoint url>"
Your project file structure should look like this. Excluding the
node_modules folder
.
├── package-lock.json
├── package.json
├── src
│   └── index.js
└── wrangler.toml
This is a basic hello world worker and to test it locally run the following command.
npx wrangler dev
This should start a local sever at http://localhost:8787.
If you navigate to that url you should see Hello World! printed

Next we need to deploy the worker to cloudflare with the following command.
npx wrangler deploy
This should print the url of the deployed worker in the format https://example-r2-multipart-upload.username.workers.dev
If you open this in the browser it should look exactly like the local
version.

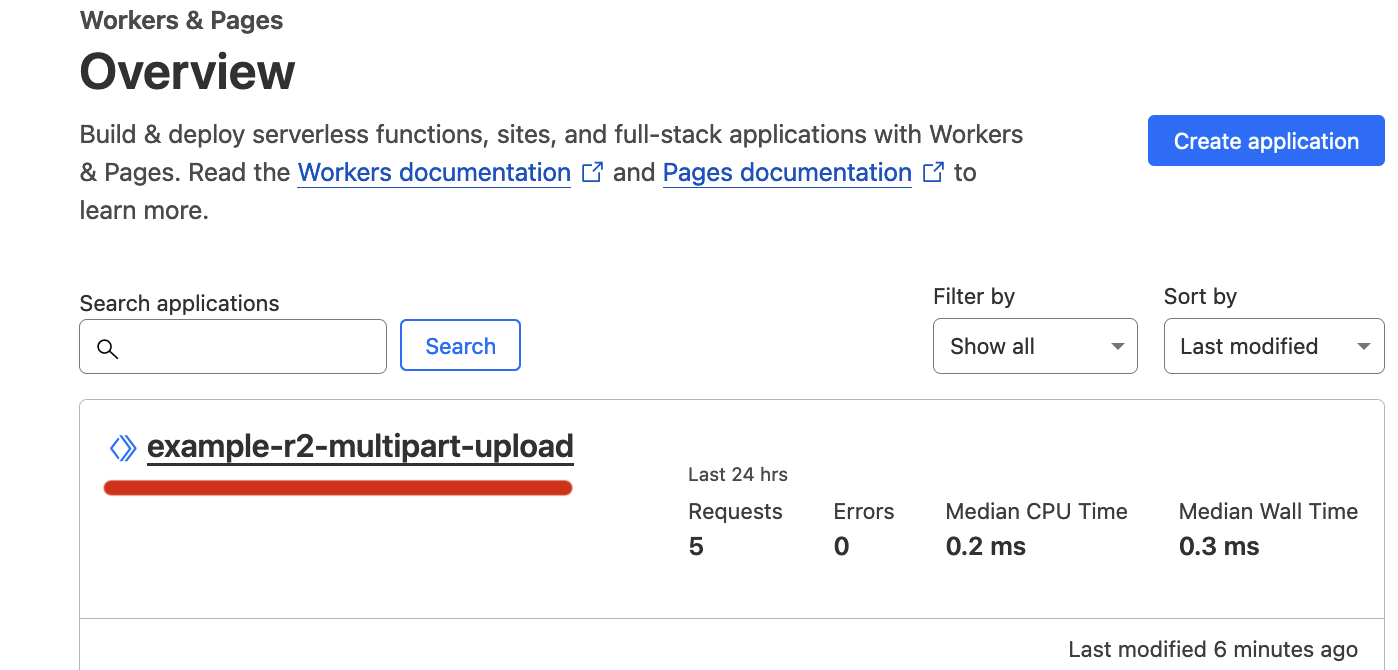
If you navigate to the cloudflare dashboard you should see the worker
deployed.
Server side logic for multipart upload#
Multipart uploads are a three part process on the server side.
- Iniating the upload
- Uploading the individual parts
- Finalizing the upload
Eeach one of these operations has a specific aws-sdk command to be implmented at a url endpoint of our worker. I will go into detail about how to implement the upload from the client side after we have the worker logic in place.
Setup the ‘router’ for the worker#
Add the following code to src/index.js.
import {
  S3Client,
  CreateMultipartUploadCommand,
  UploadPartCommand,
  CompleteMultipartUploadCommand
} from "@aws-sdk/client-s3";


export default {
  async fetch(request, env, ctx) {

    const S3 = new S3Client({
      region: "auto",
      endpoint: env.CF_ENDPOINT,
      credentials: {
        accessKeyId: env.R2_ACCESS_KEY_ID,
        secretAccessKey: env.R2_SECRET_ACCESS_KEY,
      },
    });

    const headers = {
      "Access-Control-Allow-Origin": "*",
      "Access-Control-Allow-Methods": "GET, OPTIONS, PUT",
      "Access-Control-Allow-Headers": "*"
    }

    const url = new URL(request.url);
    const base = url.pathname.split('/').slice(1)[0];

    if (request.method === 'GET') {
      if (base === 'getMultiPartUpload') {
        return getMultiPartUpload(S3, request, headers);
      }
    }

    if (request.method === 'POST') {
      if (base === 'uploadPart') {
        return uploadPart(S3, request, headers);
      }
      if (base === 'completeMultipartUpload') {
        return completeMultipartUpload(S3, request, headers);
      }
    }
  }

};
Explanation of the above code
1 We import the necessary aws-sdk commands for the multipart upload
and creating a new S3 client.
import {
  S3Client,
  CreateMultipartUploadCommand,
  UploadPartCommand,
  CompleteMultipartUploadCommand
} from "@aws-sdk/client-s3";
2 We create a new S3 client with the endpoint and credentials from
our wrangler.toml file. env is an object that contains the values
under [vars] in the wrangler.toml file.
const S3 = new S3Client({
  region: "auto",
  endpoint: env.CF_ENDPOINT,
  credentials: {
    accessKeyId: env.R2_ACCESS_KEY_ID,
    secretAccessKey: env.R2_SECRET_ACCESS_KEY,
  },
});
3 We define the headers that will be returned with each response.
without these headers the browser will get a CORS error.
const headers = {
  "Access-Control-Allow-Origin": "*",
  "Access-Control-Allow-Methods": "GET, OPTIONS, PUT",
  "Access-Control-Allow-Headers": "*"
}
4 We parse the url and get the first part of the path. This will
serve as a router for the worker.
const url = new URL(request.url);
const base = url.pathname.split('/').slice(1)[0];
5 We check the method and the path of the request and call the appropriate
function either getMultiPartUpload,uploadPart or completeMultipartUpload.
The specific parameters for each function will be stored either in the request
body or the url query parameters so we just need to pass the the S3 request
and headers to each function.
if (request.method === 'GET') {
  if (base === 'getMultiPartUpload') {
    return getMultiPartUpload(S3, request, headers);
  }
}

if (request.method === 'POST') {
  if (base === 'uploadPart') {
    return uploadPart(S3, request, headers);
  }
  if (base === 'completeMultipartUpload') {
    return completeMultipartUpload(S3, request, headers);
  }
}
Implement the getMultiPartUpload function#
In this function we parse out the bucket and key from the
url query parameters and call the CreateMultipartUploadCommand
async function getMultiPartUpload(S3, request, headers) {
  try {
    const url = new URL(request.url);
    const params = url.searchParams;
    const bucket = params.get('bucket');
    const key = params.get('key');

    const command = new CreateMultipartUploadCommand({
      Bucket: bucket,
      Key: key
    });

    const response = await S3.send(command);

    return new Response(JSON.stringify({
      msg: 'Success: /getMultiPartUpload',
      response: response
    }), {
      status: 200,
      headers: headers
    });

  } catch (err) {
    return new Response(JSON.stringify({
      msg: 'Error: /getMultiPartUpload',
      error: err
    }), {
      status: 500,
      headers: headers
    });
  }
};
This function should return a response with the uploadId that we will store on the cleint side
and pass to all requests to uploadPart and completeMultipartUpload
{
  "Bucket": "examplebucket",
  "Key": "largeobject",
  "UploadId": "ibZBv_75gd9r8lH_gqXatLdxMVpAlj6ZQjEs.OwyF3953YdwbcQnMA2BLGn8Lx12fQNICtMw5KyteFeHw.Sjng--"
}
Implement the uploadPart function#
In this function we parse out the bucket, key, partNumber and uploadId from the
the url query parameters and the file from the request body. We then call the UploadPartCommand
It should return a response with the ETag of the uploaded part. We will store this on the client side we
can pass it to the completeMultipartUpload function. which will finalize the upload.
{
  "ETag": "\"d8c2eafd90c266e19ab9dcacc479f8af\""
}
Add this function to src/index.js
async function uploadPart(S3, request, headers) {

  try {
    const url = new URL(request.url);
    const params = url.searchParams;
    const bucket = params.get('bucket');
    const key = params.get('key');
    const partNumber = params.get('partNumber');
    const uploadId = params.get('uploadId');

    const formData = await request.formData();
    const fileData = formData.get('file');

    const input = {
      "Body": fileData,
      "Bucket": bucket,
      "Key": key,
      "PartNumber": partNumber,
      "UploadId": uploadId
    };

    const command = new UploadPartCommand(input);
    const response = await S3.send(command);

    return new Response(JSON.stringify({
      msg: 'Success: /uploadPart',
      response: response
    }), {
      status: 200,
      headers: headers
    });

  } catch (err) {
    return new Response(JSON.stringify({
      msg: 'Error: /uploadPart',
      error: err
    }), {
      status: 500,
      headers: headers
    });
  }
}
Implement the completeMultipartUpload function#
Finally in this function we parse out the bucket, key and uploadId from the
query parameters and the parts from the request body. We then call the CompleteMultipartUploadCommand
async function completeMultipartUpload(S3, request, headers) {

  try {
    const url = new URL(request.url);
    const params = url.searchParams;
    const bucket = params.get('bucket');
    const key = params.get('key');
    const uploadId = params.get('uploadId');

    const partsData = await request.json();
    const parts = partsData.parts;

    const input = {
      "Bucket": bucket,
      "Key": key,
      "UploadId": uploadId,
      "MultipartUpload": {
        "Parts": parts
      }
    }

    const command = new CompleteMultipartUploadCommand(input);
    const response = await S3.send(command);

    return new Response(JSON.stringify({
      msg: '/completeMultipartUpload',
      response: response
    }), {
      status: 200,
      headers: headers
    });
  } catch (err) {
    return new Response(JSON.stringify({
      msg: 'Error: /completeMultipartUpload',
      error: JSON.stringify(err)
    }), {
      status: 500,
      headers: headers
    });
  }
}
This function should return a response with the Bucket, ETag, Key and Location
of the uploaded object. You can use the Location to serve the file from the bucket, although
we did not cover that in this tutorial so Location will not be a valid url.
{
  "Bucket": "<your_bucket>",
  "ETag": "\"4d9031c7644d8081c2829f4ea23c55f7-2\"",
  "Key": "<object_key>",
  "Location": "<base_coudflare_endpoint>/<your_bucket>/<object_key>"
}
Client side logic for multipart upload#
The client side logic for a multipart upload is also a three part process.
- Initiate the upload with a post request to the worker
- Split the file into parts and upload each part with a post request
- Finalize the upload with a post request to the worker
This is a basic html file with form and embedded javascript function to handle the multipart upload. There’s no styling, error handling or progress bar. You can add that later.
Create a new html file called index.html in the root of the project
and add the following code.
<html>
<body>
<div>
<input type="file" id="fileUpload" />
<button id="uploadButton" onclick="uploadFile()">Upload</button>
</div>
<script>
async function uploadFile() {
// 1 configure the base url and bucket name
const BASE_CF_URL = 'http://localhost:8787';
const bucketName = 'example';
const file = document.getElementById('fileUpload').files[0];
const key = `${file.name}`;
const CHUNK_SIZE = 5 * 1024 * 1024; // 5MB
const totalParts = Math.ceil(file.size / CHUNK_SIZE);
// 2 initiate the upload
const getMutltiPartUploadUrl = new URL(`${BASE_CF_URL}/getMultiPartUpload`);
getMutltiPartUploadUrl.searchParams.append('bucket', bucketName);
getMutltiPartUploadUrl.searchParams.append('key', key);
const uploadIdResponse = await fetch(getMutltiPartUploadUrl, {
method: 'GET'
});
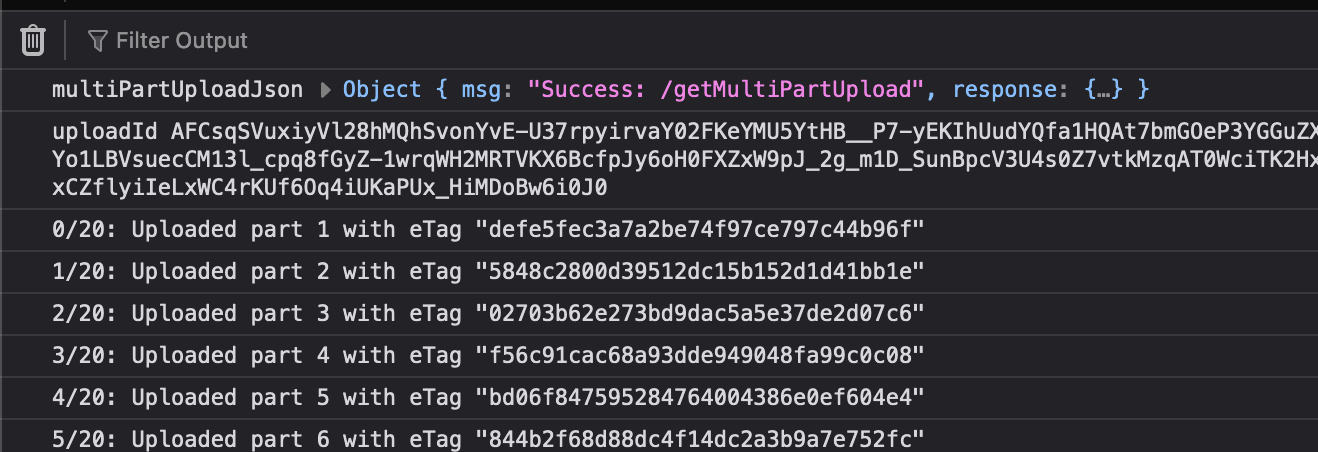
const multiPartUploadJson = await uploadIdResponse.json();
console.log('multiPartUploadJson', multiPartUploadJson);
const uploadId = multiPartUploadJson.response.UploadId;
console.log('uploadId', uploadId);
// 3 upload the parts
const partsData = [];
const uploadPartUrl = new URL(`${BASE_CF_URL}/uploadPart`);
uploadPartUrl.searchParams.append('bucket', bucketName);
uploadPartUrl.searchParams.append('key', key);
uploadPartUrl.searchParams.append('uploadId', uploadId);
for (let i = 0; i < totalParts; i++) {
const start = CHUNK_SIZE * i;
const end = Math.min(file.size, start + CHUNK_SIZE);
const blob = file.slice(start, end);
const partNumber = i + 1;
const formData = new FormData();
formData.append('file', blob);
uploadPartUrl.searchParams.set('partNumber', partNumber);
const uploadPartResponse = await fetch(uploadPartUrl, {
method: 'POST',
body: formData
});
const uploadPartJson = await uploadPartResponse.json();
const eTag = uploadPartJson.response.ETag;
partsData.push({ PartNumber: partNumber, ETag: eTag });
console.log(`${i}/${totalParts}: Uploaded part ${partNumber} with eTag ${eTag} `);
}
// 4 finalize the upload
const completeUploadUrl = new URL(`${BASE_CF_URL}/completeMultipartUpload`);
completeUploadUrl.searchParams.append('bucket', bucketName);
completeUploadUrl.searchParams.append('key', key);
completeUploadUrl.searchParams.append('uploadId', uploadId);
console.log('partsData', partsData);
const completeUploadResponse = await fetch(completeUploadUrl, {
method: 'POST',
body: JSON.stringify({ parts: partsData })
});
console.log(await completeUploadResponse.json());
}
</script>
</body>
</html>
Explanation of the above uploadFile function
1.1 We define the base url of the cloudflare worker. This should be the url that was printed
when you deployed the worker. You can also use the local url if you are testing locally.
You also need to define the bucketName and the key of the file you are uploading.
1.2 We also define the chunk size of the file to be uploaded. This needs to be relatively
small to keep the worker cpu time less than 7ms. If the worker takes longer than 7ms
you will get a Worker exceeded CPU time limit error.
1.3 We calculate the total number of parts that the file will be split into.
The maximum number of parts is 10000 so you should factor that into your chunk size.
const BASE_CF_URL = 'http://localhost:8787';
const bucketName = 'example';

const file = document.getElementById('fileUpload').files[0];
const key = `${file.name}`;

const CHUNK_SIZE = 5 * 1024 * 1024; // 5MB
const totalParts = Math.ceil(file.size / CHUNK_SIZE);
2 We initiate the upload with a get request to the worker. We pass the bucket and key
as query parameters. The worker will return a response with the uploadId that we will use
for the rest of the upload process.
const getMutltiPartUploadUrl = new URL(`${BASE_CF_URL}/getMultiPartUpload`);
getMutltiPartUploadUrl.searchParams.append('bucket', bucketName);
getMutltiPartUploadUrl.searchParams.append('key', key);

const uploadIdResponse = await fetch(getMutltiPartUploadUrl, {
  method: 'GET'
});

const multiPartUploadJson = await uploadIdResponse.json();
console.log('multiPartUploadJson', multiPartUploadJson);

const uploadId = multiPartUploadJson.response.UploadId;
console.log('uploadId', uploadId);
3 We upload the parts of the file. We loop through the file and slice it into chunks
and upload each chunk with a post request to the worker. The chunks should be stored
as a FormData object and passed as the body of the request. The worker will return
the ETag of the uploaded part. We store the ETag and the partNumber in an array
partsData for the final request to completeMultipartUpload.
const partsData = [];
const uploadPartUrl = new URL(`${BASE_CF_URL}/uploadPart`);
uploadPartUrl.searchParams.append('bucket', bucketName);
uploadPartUrl.searchParams.append('key', key);
uploadPartUrl.searchParams.append('uploadId', uploadId);

for (let i = 0; i < totalParts; i++) {
    const start = CHUNK_SIZE * i;
    const end = Math.min(file.size, start + CHUNK_SIZE);
    const blob = file.slice(start, end);
    const partNumber = i + 1;

    const formData = new FormData();
    formData.append('file', blob);
    uploadPartUrl.searchParams.set('partNumber', partNumber);

    const uploadPartResponse = await fetch(uploadPartUrl, {
        method: 'POST',
        body: formData
    });


    const uploadPartJson = await uploadPartResponse.json();
    const eTag = uploadPartJson.response.ETag;

    partsData.push({ PartNumber: partNumber, ETag: eTag });

    console.log(`${i}/${totalParts}: Uploaded part ${partNumber} with eTag ${eTag} `);

}
4 Finally we finalize the upload with a post request to the worker. We pass the bucket, key, uploadId
and the partsData array as a json object in the body of the request. The worker will return a response with
the Bucket, ETag, Key and Location of the uploaded object.
const completeUploadUrl = new URL(`${BASE_CF_URL}/completeMultipartUpload`);
completeUploadUrl.searchParams.append('bucket', bucketName);
completeUploadUrl.searchParams.append('key', key);
completeUploadUrl.searchParams.append('uploadId', uploadId);

console.log('partsData', partsData);

const completeUploadResponse = await fetch(completeUploadUrl, {
    method: 'POST',
    body: JSON.stringify({ parts: partsData })
});

console.log(await completeUploadResponse.json());
Testing it out#
To test this out just open index.html in a browser and select a file to upload.
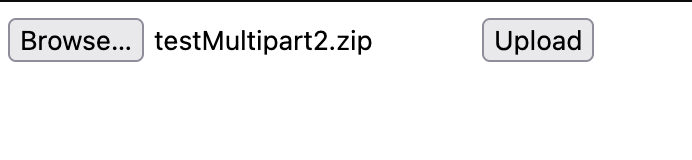
It will also help to have the browser console open to see the progress of the upload.
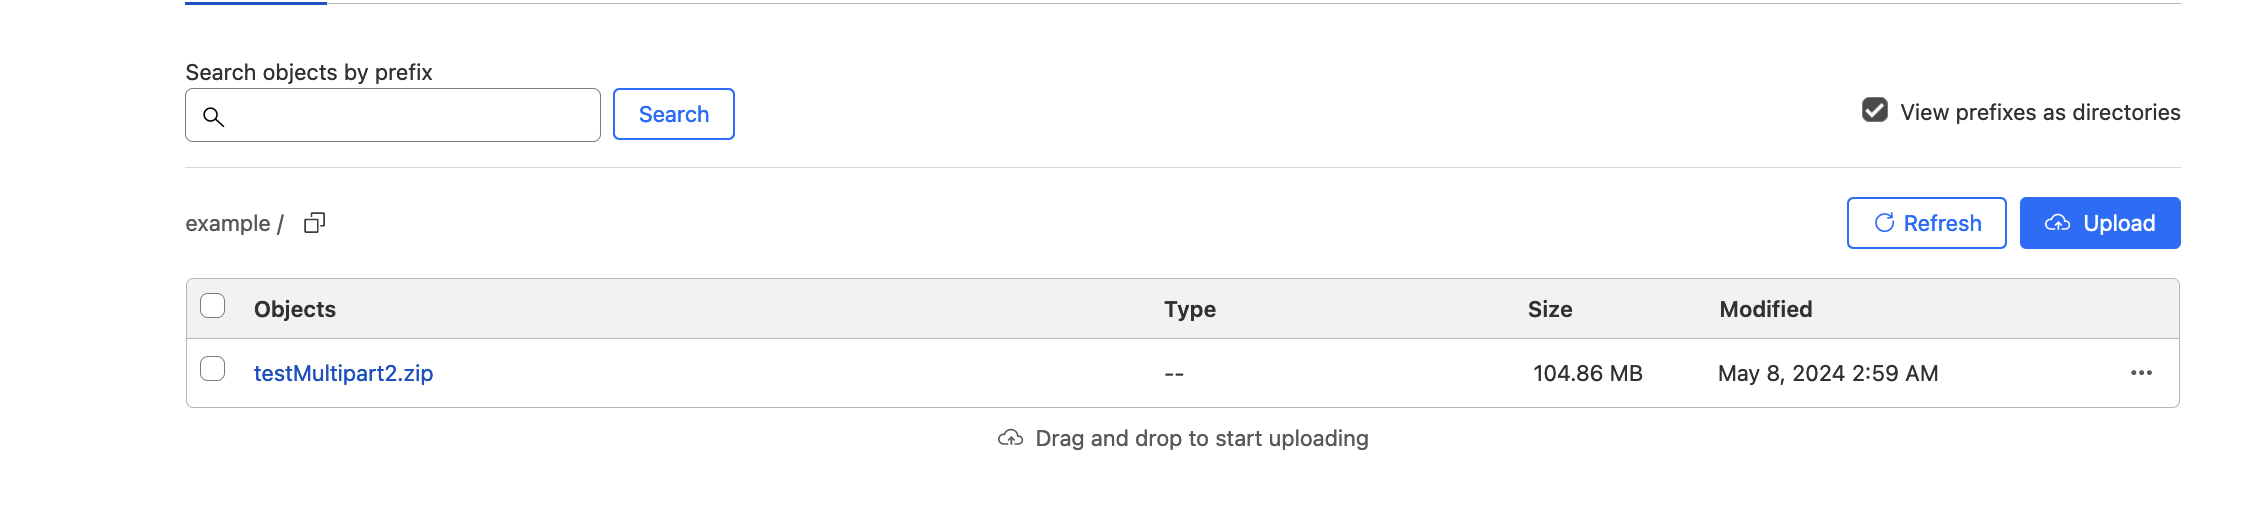
If everything works correctly you should be able to see the uploaded object in the cloudflare dashboard.
Github repo with the code for this tutorial can be found here.
If you found this helpful plese consider donating to my BuyMeACoffee