Understanding the Fashion-MNIST IDX format

I’ve been getting back into machine learning so I can hopefully still have a job in 5 years. When I first played around with ML a couple of years ago all of the introductory tutorial use the fashion-mnist dataset. for example, this is a snippet from Tenserflows image classification tutorial.
fashion_mnist = tf.keras.datasets.fashion_mnist
(train_images, train_labels), (test_images, test_labels) = fashion_mnist.load_data()
While this tutorial is supposed to be a quick start it glosses over a huge part of the learning process if you’re trying to learn about how these models are built from scratch. What does the raw data actually look like? How are the labels structured? How is this labeled data parsed and put into a usable format?
When I set out to answer these questions by just downloading the dataset itself I was left with more questions. The official fashion-MNIST git repo tells us to load the data set with the following lines in the README.md
import mnist_reader
X_train, y_train = mnist_reader.load_mnist('data/fashion', kind='train')
X_test, y_test = mnist_reader.load_mnist('data/fashion', kind='t10k')
These are the files in data/fashion
fashion
├── t10k-images-idx3-ubyte.gz
├── t10k-labels-idx1-ubyte.gz
├── train-images-idx3-ubyte.gz
└── train-labels-idx1-ubyte.gz
When you unzip these files and run the file command on them it only describes them as data
gunzip t10k-images-idx3-ubyte.gz
file t10k-images-idx3-ubyte
# t10k-images-idx3-ubyte: data
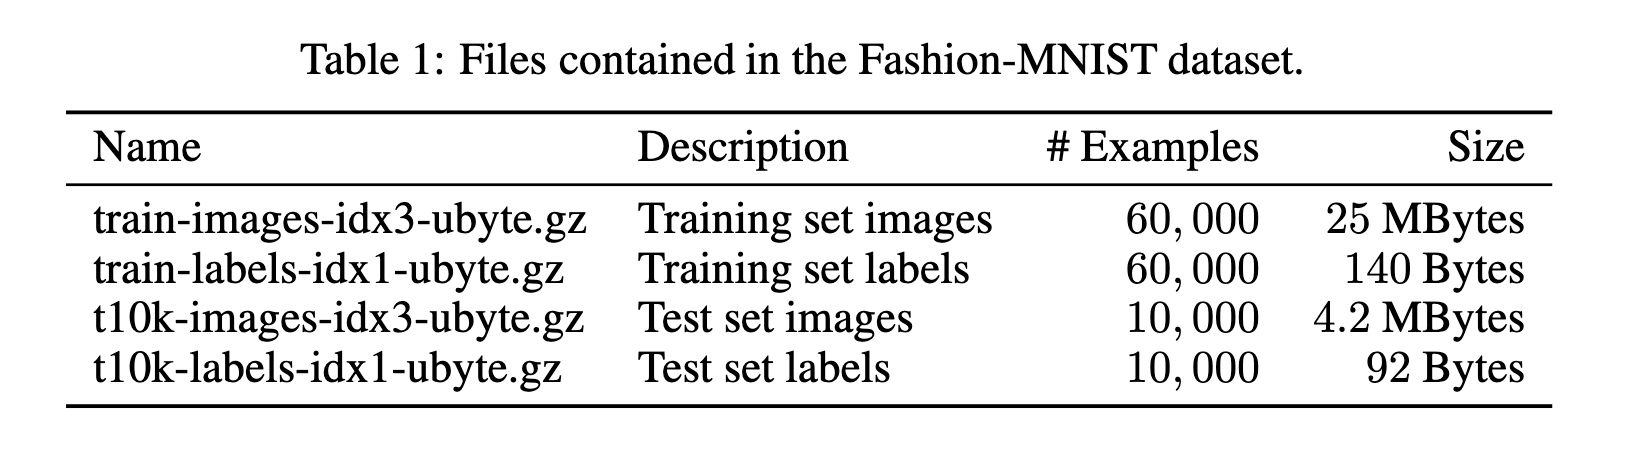
The dataset is supposed to be comprised of 70,000 28x28 grey scale images 10,000 for training and there respective labels. But everywhere you download the dataset, the actual images seem to be missing.
The official fashion-MINST white paper on the dataset
references these ubyte.gz as well but doesn’t explain them. Perhaps they’re
using the format of the original MINST dataset?
I couldn’t find any papers for the original hand drawn MINST dataset but I
did find a format specification on the web site the original dataset was posted. (Used an archive.org snapshot because https://yann.lecun.com/exdb/mnist is sometimes blocked)
Interesting Quote from this page:
These files are not in any standard image format. You have to write your own (very simple) program to read them.
A the bottom of this page the page it includes what the “IDX” format consists of
THE IDX FILE FORMAT#
the IDX file format is a simple format for vectors and multidimensional matrices of various numerical types.
The basic format is
magic number
size in dimension 0
size in dimension 1
size in dimension 2
.....
size in dimension N
data
The magic number is an integer (MSB first). The first 2 bytes are always 0.
The third byte codes the type of the data:
0x08: unsigned byte
0x09: signed byte
0x0B: short (2 bytes)
0x0C: int (4 bytes)
0x0D: float (4 bytes)
0x0E: double (8 bytes)
The 4-th byte codes the number of dimensions of the vector/matrix: 1 for vectors, 2 for matrices…. The sizes in each dimension are 4-byte integers (MSB first, high endian, like in most non-Intel processors). The data is stored like in a C array, i.e. the index in the last dimension changes the fastest.
It also provide a breakdown of the dataset files in reference to this format
TRAINING SET IMAGE FILE (train-images-idx3-ubyte):#
[offset] [type]          [value]          [description]
0000     32 bit integer  0x00000803(2051) magic number
0004     32 bit integer  60000            number of images
0008     32 bit integer  28               number of rows
0012     32 bit integer  28               number of columns
0016     unsigned byte   ??               pixel
0017     unsigned byte   ??               pixel
........
xxxx     unsigned byte   ??               pixel

Pixels are organized row-wise. Pixel values are 0 to 255. 0 means background (white), 255 means foreground (black).
My understanding of this#
Assuming fashion-MINST and the original MINST dataset are encoded with
the same format, things start making sense when we look at the first line
of a hexdump of unziped train-images-idx3-ubyte
00000000: 0000 0803 0000 ea60 0000 001c 0000 001c .......`........
- Magic Number:
0803- 08 signifies the data type as unsigned byte, meaning our values should be between 0 and 255, signifying the grey scale color value of a pixel
- 03" indicates that there are three dimensions to the data. These dimensions are rows,columns and pixel values
- Number of images:
ea60ea60translates to 60000, which lines up with the fact that this file should contain the traning images
- Number of Rows:
001c001ctranslates to 28, which is the number of pixels in a row for each image
- Number of Columns:
001c001ctranslates to 28, which is the number of pixels in a column for each image
After these first bytes, I’m assuming every subsequent byte is an integer between 0 and 255 and every 784 bytes denotes a new image.
A similar format is used for the labels dataset, except every the data is in one dimension and every subsequent byte represents a label for every 784 bytes in the labels file
labels hex dump
00000000: 0000 0801 0000 ea60 0900 0003 0002 0702 .......`........
To understand how these are parsed into usable data let’s look at the load_mnist
function seen previously.
def load_mnist(path, kind='train'):
    import os
    import gzip
    import numpy as np

    """Load MNIST data from `path`"""
    labels_path = os.path.join(path,
                               '%s-labels-idx1-ubyte.gz'
                               % kind)
    images_path = os.path.join(path,
                               '%s-images-idx3-ubyte.gz'
                               % kind)

    with gzip.open(labels_path, 'rb') as lbpath:
        labels = np.frombuffer(lbpath.read(), dtype=np.uint8,
                               offset=8)

    with gzip.open(images_path, 'rb') as imgpath:
        images = np.frombuffer(imgpath.read(), dtype=np.uint8,
                               offset=16).reshape(len(labels), 784)

    return images, labels
After gunziping the data the labels are read into the labels variable
from the bytes array read from the file. the numpy.frombuffer method
used to make a numpy.ndarray from the bytes array and the offest is
set to 8 to avoid reading in the the dimension specifications.
labels = np.frombuffer(lbpath.read(), dtype=np.uint8,
                        offset=8)
The same is done to the image variable but the offset starts at 16.
It’s “reshaped” using the length of labels which is 60000 representing
the number of images in the dataset and 784 which is the number of pixels
each image contains
before reshape
images.shape(): (47040000,)
after reshape
images.shape(): (60000, 784)
This was confusing for me to understand but you can think about it like takeing a 1D array with 47040000 elements and splitting it into a 2D array with 60000 rows each with 784 elements.
foo = np.array([1, 2, 3, 4, 5, 6])
bar = foo.reshape(3,2)
print(bar)
""" output
[[1 2]
 [3 4]
 [5 6]]
"""
The examples from numpys docs might help too
Looking at the data#
If we go back two our two data reading example from earlier
from the MIST git repo
import mnist_reader
X_train, y_train = mnist_reader.load_mnist('data/fashion', kind='train')
X_test, y_test = mnist_reader.load_mnist('data/fashion', kind='t10k')
from Tenserflow
fashion_mnist = tf.keras.datasets.fashion_mnist
(train_images, train_labels), (test_images, test_labels) = fashion_mnist.load_data()
Tenserflow does a better job at explaining what we are getting from the dataset. so let’s rename the variables in the mist snippet and print out there shapes
train_images, train_labels = mnist_reader.load_mnist('data/fashion', kind='train')
test_images, test_labels= mnist_reader.load_mnist('data/fashion', kind='t10k')
print(f"train_images.shape(): {train_images.shape}")
print(f"train_labels.shape(): {train_labels.shape}")
print(f"test_images.shape(): {test_images.shape}")
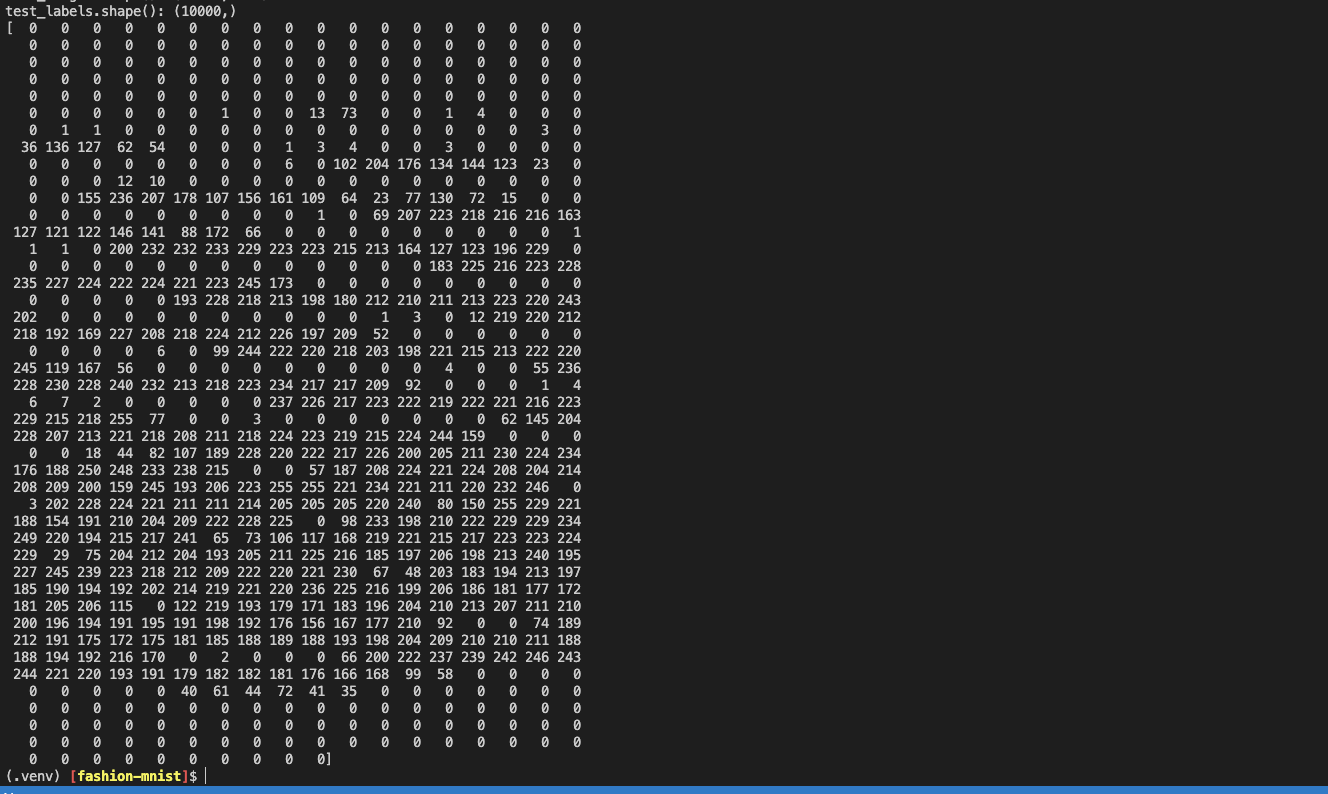
print(f"test_labels.shape(): {test_labels.shape}")
as you can see the output shows our four arrays in ready for the classic 80/20 split of training and testing
train_images.shape(): (60000, 784)
train_labels.shape(): (60000,)
test_images.shape(): (10000, 784)
test_labels.shape(): (10000,)
if we print out print(train_images[0]) we can see an array that looks like it could
be an image of something
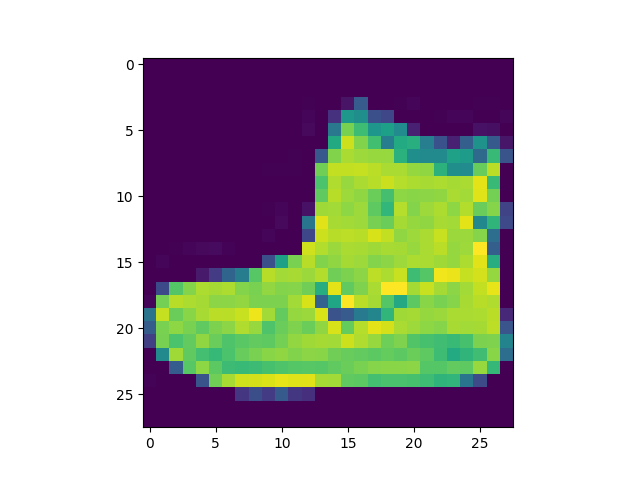
In order to view this image we need to use matplotlib imgshow method
which can take in a numpy.ndarray and convert it to an image, however
if we just run the following it will fail
import matplotlib.pyplot as plt
plt.imshow(train_images[0])
plt.show()
# TypeError: Invalid shape (784,) for image data
This is because train_images[0] is still a 1D array with 784 pixel values which would
make for a goofy image. To view the image we need to reshape the array into a
28x28 2D array which will represent our image at the correct aspect ratio.
plt.imshow(train_images[0].reshape(28,28))
plt.show()
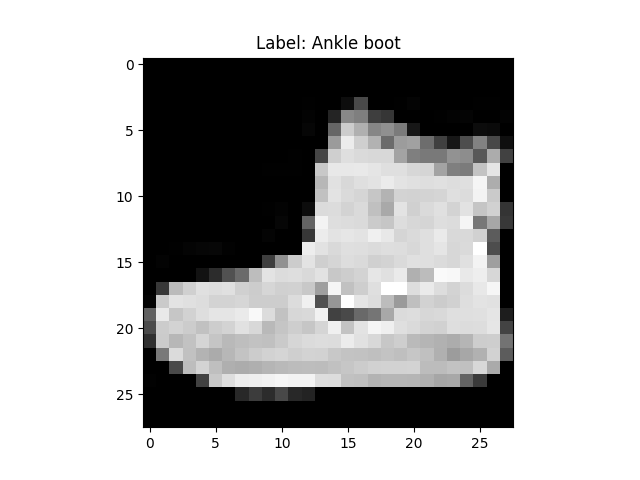
This is good but, let’s convert it to greyscale with cmap='gray
and use the same index of the image in train_images to show the label
plt.imshow(train_images[0].reshape(28,28), cmap='gray')
plt.title(f"Label: {train_images[0]}")
plt.show()
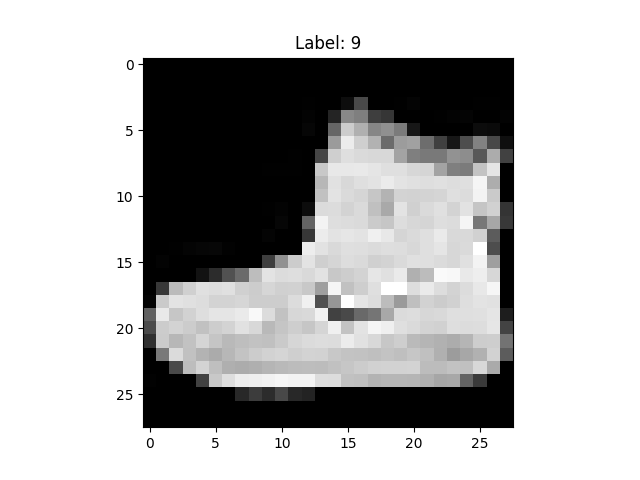
One more thing, the labels are stored as integers and we need to convert them to strings based of this key:
| Label | Description |
|---|---|
| 0 | T-shirt/top |
| 1 | Trouser |
| 2 | Pullover |
| 3 | Dress |
| 4 | Coat |
| 5 | Sandal |
| 6 | Shirt |
| 7 | Sneaker |
| 8 | Bag |
| 9 | Ankle boot |
class_names = ['T-shirt/top', 'Trouser', 'Pullover', 'Dress', 'Coat',
               'Sandal', 'Shirt', 'Sneaker', 'Bag', 'Ankle boot']
plt.imshow(train_images[0].reshape(28,28), cmap='gray')
plt.title(f"Label: {class_names[train_labels[0]]}")
plt.show()
I’m not sure why the MNIST datasets are stored in such a hacky way, but if you’re a beginner this format can be a huge obstacle. Especially it doesn’t seem like many other models use this hyper-specific format. The kaggle dataset includes csv files which greatly simplifies the complexity of understanding what you’re looking at, but many tutorials opt to use the IDX format. Anyway I hope this helps someone starting out with ML.